Saturday, December 27, 2008

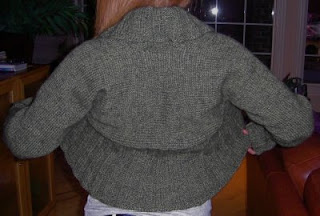
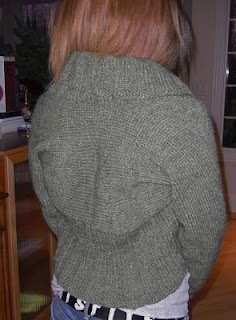
Nightfall.....


Nightfall.....

Download a PDF of Nightfall.


Finished Size 48” x 5”
Materials:
Tahki Taos (1.75 oz /50 g; 60 yds/55 m; 95%; Wool/ 5% Nylon) 10 balls
One pair size US 13 needles or size needed to obtain gauge.

Gauge: 8 sts = 4”/10cm ( Gauge is not critical to this piece)

Pattaern Stitches
Feather and Fan with garter stitch border
Row 1: Knit
Row 2: Knit 5, p to last 5 sts, k5
Row 3 Knit5, [(k2tog) 3 times, (yo, k1) 5 times, yo,(k2tog)3 times] repeat to last 5 sts, k5
Row 4: Repeat row 2
Repeat these four rows for feather and fan stitch

Cast on 95 sts. Knit 5 rows. Begin Feather and Fan with garter stitch border pattern. Continue in pattern until enough yarn is left to work 6 rows. Knit 5 rows. Bind off all stitches in pattern. Weave in ends and block.


Tuesday, December 23, 2008

Lux

This is the second bag I designed after beginning at This & That. The bag was eventually felted by Kim and now belongs to Deborah. You can use it as knitted or felted, either way! It felts out nicely with a really great texture.

Download a PDF of Lux.


What is lux?
Lux = The SI unit of illumination.


Lux


Materials:
MC: Tahki Baby (60 yds/ m; ozs/ g; 100% merino wool) dark blue 3 balls.
CC: Tahki Baby (60 yds/ m; ozs/ g; 100% merino wool) light blue 2 balls.
One pair Size 15, 24 inch, circular needles or size needed to obtain correct gauge.
Gauge: 8.5 stitches = 4 inches in garter stitch (gauge is not critical to this piece)
Finished size: 14 x 16 inches
With MC cast on 60 stitches. Join in the round being careful not to twist work. Work in garter
stitch as follows:
Round 1—knit
Round 2—purl
Round 3—knit
Round 4—purl
Join CC and repeat rounds 1-4.
Continue working rounds 1-4 alternating MC and CC to create stripes, carrying the unused yarn
along the inside of the bag. Work until piece measures 14 inches, ending with MC. Break CC.
Make handles as follows:
With MC knit 1 round.
Next round: purl 10 stitches, bind off 10 stitches, purl 20 stitches, bind of 10 stitches, purl 10
stitches.
Next round: knit 10 stitches, cast on 10 stitches, knit 20 stitches, cast on 10 stitches, knit 10
stitches.
Purl 1 round
Knit 1 round
Bind off all stitches.
Finishing:
Sew together bottom.
Weave in all loose ends.
Block if necessary. May also be felted.

Saturday, December 20, 2008

Bourse de Selle


This is an old pattern I wrote for This & That . The sample above has long since been sold but the pattern is still available.

Download a PDF of Bourse de Selle.
Bourse de Selle
(Saddle Bag)


Materials: Tahki Baby yarn (60 yds/ m; ozs/ g; 100% merino wool)
One pair size US 15 needles or size needed to obtain gauge
Pin or button (optional)

Finished Size: 8”x5”x2”

Gauge: 10 sts= 4”/10 cm (gauge is not critical to this piece)

Cast on 20 stitches.

Make purse flap:

Row 1: knit (RS)
Row 2: knit
Row 3: knit
Row 4: knit first 3 stitches, purl 14, knit last 3 stitches (WS)

Repeat rows 3 and 4 until piece measures 5 inches ending with a wrong side row.

Knit purse body:

Next row: knit
Next row: purl

Continue in stockinette stitch until entire piece measures 16 inches, ending with a WS row. Knit 4 more rows (garter stitch).

Knit gussets and strap:

Cast on 6 stitches.

Work in stockinette stitch (knit on RS/purl on WS) for 5 inches, ending on a WS row—1 gusset made.
Next row begin strap in garter stitch (knit every row) Continue until entire piece measures 33 inches (or length desired for strap ). End on a WS row.
Next row (RS) begin second gusset in stockinette stitch (knit on RS/purl on WS) until entire piece measures 38 inches. Bind off.

Assemble Purse:

Fold bottom of body to beginning of flap with RS facing out. Sew gussets to sides of purse being careful not to twist strap. Fold flap over purse opening. Embellish with pin or button. Weave in loose ends and block.

Thursday, December 18, 2008

Avoiding Frustration

The past few weeks have proved challenging for many of you. Several of you are working on some pretty demanding projects.
Most of you saw "Izzy's big save" which could have been disaster. All of you have made big strides in your knitting from neatness to difficulty of projects. You are learning to "diagnose" and fix mistakes, steps towards technical knitting independence. Take a moment to look back over time, say one year ago, and look at the projects you've tackled, your successes, and the techniques you've mastered. I decided to post this "excerpt" I have saved from some old word documents to help you through some of the more frustrating issues in reference to knitting as you advance into uncharted waters :


Knitting can be frustrating at times. It helps to always keep in mind that this is a hobby, time spent on yourself. I consider my time to be extremely valuable and therefore I prefer to avoid frustration. There are several things that can lead to knitting frustration.

Choosing the wrong pattern will make knitting unenjoyable. Knitting a pattern above your skill level or getting mired down in a monotonous project is no fun. My philosophy is if you’re not having fun, put it down and do something else. You may find yourself able to work on that difficult project down the road and you can chip away at the monotonous project in between more engaging works. The key is to like what you are doing.

Unrealistic expectations are also a cause for frustration. I have never seen something hand knit that looks like a machine made it. I have seen knitting that was done poorly and looked sloppy. The realistic goal is to have something that looks handmade and polished. It is a goal and requires time and practice. Each piece you complete should look better than its predecessor.

Another unrealistic expectation is that other people will value your efforts in the same way as we (meaning we knitters) do. While there are many people who will appreciate your effort there are some who just won’t. Most people who don’t knit, don’t understand the time and effort (physical, mental and emotional) it takes to make a piece. Pick your recipients carefully and don’t take it personally if you don’t get the response you’d expected.

Also, do not expect to save money by knitting your own items. Yarn is not cheap and neither is your time. If you see something you like, buy it, chances are it will be cheaper bought than made by hand. Spend your time making something where you will enjoy the process as well as the product.

Finding a mistake in the piece and having to rip out is frustrating. Mistakes are inevitable. I try to encourage students to fix obvious mistakes. Even if no one else ever notices the mistake, it will be the first thing you see when you look at the piece. Remember, you will learn from your mistakes; everyone will have to rip out at some point.

Lack of standardization is also frustrating to knitters. Everything from yarn specifications, equipment specifications to written directions use different standards. While the craft has been in existence since early AD, patterns have only been in existence since the late nineteenth century. Patterns and their abbreviations for the most part are similar but there is no one standard way to write instructions and this can be very frustrating. Even needles are sized using at least 3 different standards!!!


No post is complete without a contribution from Mr Zip:


Friday, December 5, 2008

Beginner's Socks

Hand knit socks have rapidly become a popular knitting project for many of my students. Trying to teach socks over a three week period was a challenge for me. I have found that there are several obstacles that students face when attempting that first pair.

-Working on double pointed needles (DPNs)
-Working on very small needles (sizes 3 and below)
-Working with fine (thin) yarn in multicolors which often obscure dropped or incorrectly knit stitches.
-Working new techniques.

To help students get a “grasp” on the learning process I wrote the following pattern. I’ve eliminated the smaller needles and difficult yarn. The pattern makes a thicker sock made of worsted weight yarn. If worked two at a time, they can easily be made in the three week time slot. Using the worsted weight wool, it is possible to complete the heel, heel turn, and gusset pickup of stitches in a 2 hour class on one sock.

Download a PDF of Beginner's Socks and Notes on Socks.


Beginner’s Socks

Sizes: Child’s, Women’s, Men’s


Finished foot circumference: 6 ½”, 8”, 9”

Abbreviations:
Dpn: double point needle
St: stitch
Sl: slip stitch. Slip all stitches purlwise unless noted.
Ssk: slip1(knitwise), slip1(knitwise), knit the slipped stitches together through the back loop
P2 tog: purl 2 sts together
K2tog: knit 2 sts together
Rnd: round

Stitch Patterns used:
1x1 ribbing—alternate k and p stitches-- knit the knit sts and purl the purl sts.
Stockinette st—knit every round (round knitting) or knit the right side row and purl the wrong side row(flat knitting)

Materials:
Worsted Weight yarn (preferably merino wool) about 350 yds for a 6" sock more or less depending on sock lenght desired. I like Mission Falls 1824 wool which is a superwash, non itching merino wool, perfect for socks.
Set of DPNs (4) sized to knit your yarn at 5 sts per inch.
Darning needle

Gauge: 10 sts= 2" or 5cm. Take time to make a gauge swatch. *see note at end

Cuff and Leg:
Cast onto 1 dpn 32(40:48) stitches. Arrange stitches evenly on 3 dpns. Being careful not to twist stitches, join in the round and work in 1x1 (k1, p1) ribbing for 2 ¾ inches (your tail will mark the beginning and end of each round or you can place a locking marker in the knitting itself). Continue to knit in stockinette st (knit every round) until total length is 5 ½ (7:8) inches or leg length desired.

Heel:
Knit across 8(10:12) sts. Turn work and purl across 16(20:24) sts. These are your heel sts. The other sts will be your instep stitches and will not be knit until later.
Work back and forth (in rows) across the heel sts as follows:
Row 1: Sl 1 (purlwise with yarn in back of work), knit across row
Row 2: Sl 1 (purlwise with yarn in front of work) purl across row
Repeat rows 1 and 2 until 16(20:24) rows have been worked(last row worked should be a purl row)

Turning the heel:
Row 1: Knit across 10(12:14) stitches, ssk, k1, turn work.
Row 2: Sl 1, p5, p2tog, p1, turn.
Row 3: Sl 1, k 6, ssk, k1, turn.
Row 4: Sl1, p 7, p2tog, p1, turn
Row 5: For child’s size: Sl 1, k 8, ssk, turn
For women’s and men’s: Sl 1, k 8, ssk, k1, turn.
Row 6: For child’s size: Sl 1, p8 p2tog. 10 stitches remain. Continue to Gusset instructions.
For women’s and men’s: Sl1, p 9, p2tog, p1, turn.
Row 7: Sl 1, k 10, ssk, (men’s size only k1), turn
Row 8: Women’s size: Sl1, p 10, p2tog. 12 stitches remain. Continue to Gusset instructions
Men’s size: Sl 1, p11, p2 tog, p1 turn
Row 9: Sl 1, k 12, ssk, turn.
Row10: Sl 1, p13, p2tog. 14 stitches remain. Continue to Gusset instructions.

Gusset:
You will now begin knitting in the round again as follows:
Knit across all heel sts and with the same dpn pick up and knit 8(10:12) sts along the selvedge edge of the heel flap. This is needle # 1
With another dpn, work across the 16 (20:24) instep stitches. This is needle #2.
With another dpn, pick up and knit 8(10:12) stitches along the other selvedge of the heel flap the knit across 4(5:6) sts on needle #1(half of the heel stitches). This is needle #3.
The round now begins between needle# 3 and needle # 1—the middle of the heel.

Rnd 1: Needle #1-- Knit to last three stitches, k2 tog, k1. Needle #2: Knit across all stitches. Needle #3: K1, ssk, knit to end.
Rnd 2: Knit without any decreases.
Repeat Rnds 1 and 2 until 32(40:48) stitches remain.

Foot:
Work even in stockinette stitch until measure 5 ½(7:8 ½) inches from back of
heel or about 1 ¾ (2 ¼:2 ½) inches less than desired foot length.

Toe:
Rnd 1: Needle #1: Knit to last three sts, k2tog,k1. Needle #2: K1,ssk, knit to
last three sts, k2tog, k1. Needle #3: K1, ssk, knit to end.
Rnd 2: Knit without any decreases.
Repeat rnds 1 and 2 until 16 (20:24) sts remain.
Then repeat only rnd 1 until 12 (16:16) sts remain.

Knit stitches from needle #1 onto needle #3.
Cut yarn leaving an 18 inch tail. Graft together the stitches from needles 2 and 3
using the Kitchenerʼs stitch.
Weave in all ends and block if desired.


Notes about Knitting Socks

Materials:
Yarn: Wool or wool blends are recommended simply because wool breathes and wicks moisture. It is also naturally elastic. Many sock wools are made to be “non-itchy” and are machine washable , check the yarn label for washing instructions. Cotton also breathes and wicks moisture but it lacks elasticity. Cotton does better when knit along side a small piece of elastic. Acrylic is not recommended as it does not breathe or wick moisture.
Elastic: Some knitters use elastic throughout the sock for extra elasticity others use elastic in the cuff, heel and toe as reinforcement. When knitting with wool, elastic is usually not necessary. This is the knitter’s choice.

Socks are knit in steps:
Cuff and leg
Heel
Turn of heel
Gusset
Foot
Toe
Grafting of toe

Kitchner’s Grafting Stitch:
This stitch joins two “live” edges together without creating a bulky seam—ideal for toes!
Thread tail through darning needle.

Caveats:
--All stitches must be worked 2 times before removing them from the needle.
--Except for preliminary stitches and final stitches, work the first 2 stitches on the front needle then the first two stitches on the back needle.

Preliminary stitches: Holding the two knitting needles parallel with the yarn attached to the back needle, thread the yarn purlwise through the first stitch on the first needle then thread the yarn knitwise through the first stitch on the back needle.

On the front needle thread the darning needle through the first stitch knitwise, then the second stitch purlwise. Remove the first stitch.
Now on the back needle thread the darning needle purlwise through the first stitch and knitwise through the second stitch. Remove the first stitch. Tighten.
Remember: Knit/ purl (front needle)
Purl /knit (back needle)
Repeat until only 1 stitch remains on each needle and finish final stitches:
Thread darning needle knitwise on front needle and purlwise on back needle. Remove both stitches, tighten and pull tail through to wrong side.


Ideal class schedule:
Class 1: cast on join in round.. At home: knit cuff and leg
Class 2: heel, heel turn, set up gusset. At home: knit gusset and foot
Class 3: toe and grafting.

A note on gauge swatches. This is how I have first timers make a sock gauge swatch:

Cast on enough stitchs for 2 inches according to the gauge in the pattern.
Knitting in rows work several inches and measure. Adjust needle sizes until swatch measures 2" across.

This method while technically incorrect is less intimidating to students and has proved to be accurate enough to knit a pair of socks that fit the recipient. After they've mastered the sock process I will then introduce them to swatching in the round.

Thursday, December 4, 2008

In other news:


First, a huge thank you to everyone at Ravelry who checked out Katy’s sweater, we got several very good patterns from which we can replicate the sweater from. I just love Ravelry.

Next, We had a good Thanksgiving.


Mexican Beef Dip

1 pound hamburger, browned and crumbled
1 small block velveeta cheese
1 15 oz jar salsa
1 can cheddar cheese soup

Pulace all ingredients in a crock pot several hous before serving. Stir occasionally. Serve with tortilla chips.
(how easy is this?)


and an old "easy" favorite from a friend:

Black Russian Cake

1 yellow cake mix
1 small instant choclate pudding mix
1 cup oil
4 eggs
1/4 cup vodka
1/4 cup Kahula
3/4 cup water

Preheat oven to 350 degrees.Grease and flour a bundt pan. Combine ingredients. Beat 4 minutes. Pour in pan. Bake 50 min.
Remove from oven when done. Cool 5 min. Remove from pan. Cool completely. Glaze.
Glaze:
Alternately add 1 tsp of Kahula and 1 tsp milk to 2 cups confectioner sugar.

*The vodka is not optional!


Next, Look what I found at Starbucks:


An Aran Sweater Mug!

And finally, Mr Zip shares this dog picture of Bambi the shaved Pomeranian:

Tuesday, December 2, 2008

Does anyone recognize this pattern:

This post is for Katy:

This is an "Icelandic" sweater made from "Icelandic" wool. Hand knit. It looks like it begins at one cuff then moves to the body then the other arm to cuff. The ribbed edging in picked up after the main section is finished. Do you recognize this pattern or know of a similar pattern?
Thanks for looking.


Tuesday, November 25, 2008

Rocchina's (Alpaca Lace) Wrap


Rochina's (Alpaca Lace) Wrap


This pattern is available at This & That

3712-B Lawndale Drive at Crosspointe Shopping Center in Greensboro, NC.

(336)288-0034

or buy it here

$3.00


Finished Size: 20 inches x 6 feet (blocked)

Materials:
Cascade Baby Alpaca Chunky #557 (100 % baby alpaca; 108 yds/99 m; 3.53 oz/100 gms) 4 skeins.
Needles size US 13 /9 mm or size needed to obtain correct gauge.
Darning needle

Gauge:
9.5 sts/ 12 rows = 4”/10 cm over lace pattern stitch (2.5 sts and 3 rows per inch)


In other news:

My "Bohus" style sweater:


The Debbie Bliss Cashmerino Aran is very soft and nice to wear.

I've completed 2 more Level 3 swatches! here is swatch 15 "charted intarsia. I found this swatch to be particularly difficult. First, choosing a design. There are many to pick from, but after choosing an planning, I realized that most images couldn't be used. While stitch patterns can be printed in compendiums and reused in one's orignal patterns, most images are copywrited and thus cannot be reproduced without consent. I had to design my own image. So here is my "original" picture "Balloons":


The intarsia itself wasn't too bad, but the strings on the balloons proved to be a particular challenge. And colors....too much yarn to think about!

I have also completed the charted symbols swatch which is blocking. This is probably where I shine the most as far as design goes.  Although the yarn for the Master's must be ordinary, it was a fun swatch.. I will share this with you in a future post


I "stole" this from the SW Lipizzan Site:


Concerning Lipizzaners:

" -They're smart. I believe that in general they're about as bright as a three-year-old human child. They're not so good on abstracts, but concrete
concepts get through just fine.
-They're sensitive. You can't bully a Lipizzan. Either he shuts down and turns to stone, or you discover that he really is genetically predisposed
toward the Airs Above the Ground. He is also a warhorse, which means that where another horse might run, he may stand and fight. This can
backfire severely with trainers who view horses as purely flight animals, and don't allow for a horse who fights back.
-They understand English (or French or German or Spanish or whatever language you like to speak to your horse). You can talk to them,
and in fact explaining a new exercise before you execute it can be very helpful. If you treat your Lipizzan like a fellow sentient being, he'll respond
in kind.
-They are powerful one-man horses, sometimes to the point of trouble. They do not generalize from the Chosen Human to anyone else, and have
to be taught to acknowledge any other human's right to tell them what to do. This is a great deal of fun in a boarding situation, as too many of us
know.
-They have really low idiot tolerance. Inept handling on the ground and poor or imprecise riding will result in a horse who is difficult or
impossible to handle. This is particularly evident in connection with vets and farriers. "

And finally, Mr Zip shares this picture of his sister by the fire:


Have a Happy Thanksgiving!

Friday, November 21, 2008

First Snow

Here is what we woke up to this morning:


A far cry from 3 weeks ago! Plus it's freezing....I'm getting to wear my sweaters at last.


Horses listen to the sound of huntsman in the woods(last Sat):


Sunday, November 16, 2008

White Horse (Cashmere) Scarf

This pattern is available at This & That

3712-B Lawndale Drive at Crosspointe Shopping Center in Greensboro, NC.

(336)288-0034

or buy it here:

$3.00


White Horse Scarf

This is a wonderfully soft short scarf, perfect for wearing under a jacket or coat next to the skin on your neck to keep out the cold or as a rich accent piece.

Finished measurements: 4” x 42” after blocking (can be made longer by increasing yarn amount.)

Materials:
Jade Sapphire Mongolian Cashmere 6-ply (100% Cashmere; 150 yds/137m; 1.94 oz/55gm) 1 skein
Needles size US 7 /4.5mm or size needed to obtain correct gauge.
Darning needle

Gauge: 20 sts and 28 rows = 4”/10 cm over blocked lace pattern


I've finished the Bohus Style Pullover. It came out great and fits perfectly.


I found this toy at WalMart. He looks strikingly familiar. Helicopter Ben is really Santa.


Thursday, November 6, 2008

Fall has finally arrived at our home:


breathtaking....


and our woods and trails:


(maybe not this)


Our friends: