Tail weaves should be unobtrusive. They should be elastic. This means that the fabric is able to be stretched in the area where the tails are woven. The tails should not pop out when the fabric is stretched. And, they should not be visible on the public side of the fabric. Below are the preferred methods for weaving in tails in several common fabrics.
If possible, weave the tails into a seam by going back and forth through the seam several times. This is one reason it’s often recommended to start a new yarn at the beginning of a row. For the Master Hand Knitting Program do not weave tails into any seams for the swatches. On projects, yes, you can weave tails neatly into seams.
If your project is seamless or for some reason you don't want to use the edge of your project, you will need to weave the tails into the fabric.
Stockinette Stitch
The absolute best tail weave for stockinette is duplicate stitch done on the wrong side. It can be difficult to grasp at first, but once you understand the track that the yarn takes, you will probably use this tail weave on all your stockinette projects.
Here is what duplicate stitch looks like on the purl side of the fabric.

I've left the ends long, so that you can see where they start and end. For your work, cut the ends close to the fabric.
How to duplicate stitch tails in stockinette:

The tail weave will cover the “frown” under the black pointer, then the “smile” above the red pointer, then the “frown” under the blue pointer. The weave can continue in this manner for as long as needed.

1 Go under the frown and smile covered by the thinner arrow.

2 Go under the smile then frown covered by the thinner arrow.

3 Go under the frown then smile covered by the thinner arrow.

4 Go under the smile then frown covered by the thinner arrow.
Continue in this manner.
How it looks with needle and yarn:

1 Go under the frown and smile.

2 Go under the smile then frown.
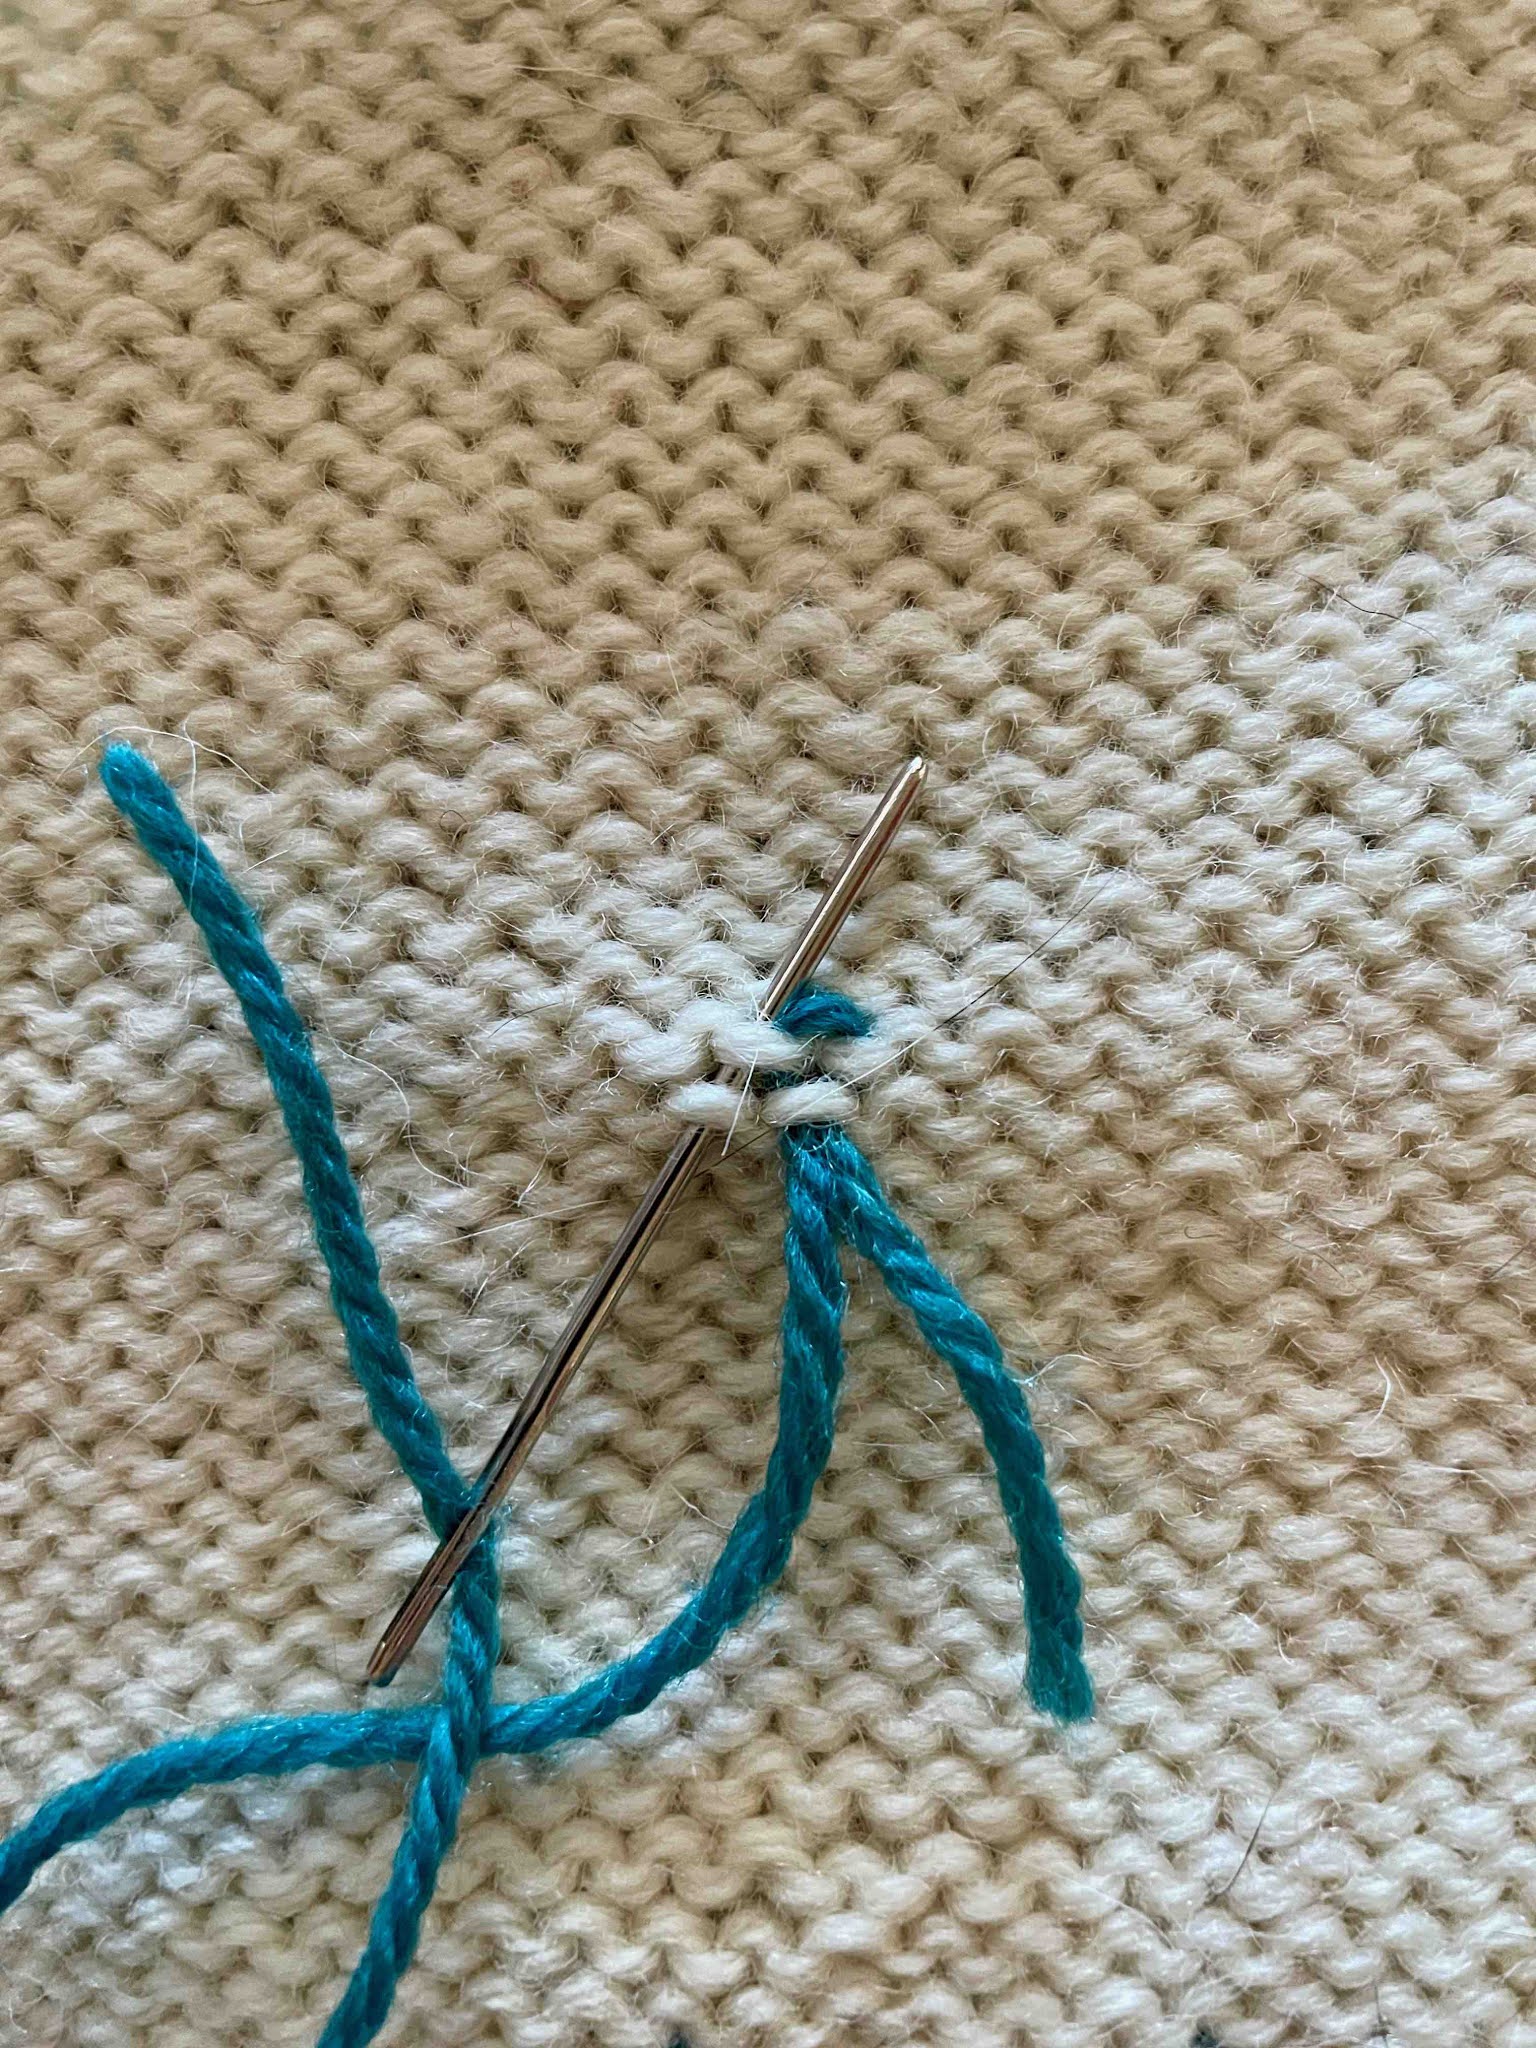
3 Go under the frown then smile.

4 Go under the smile then frown.

Go under the frown and smile.

Continue in this manner.