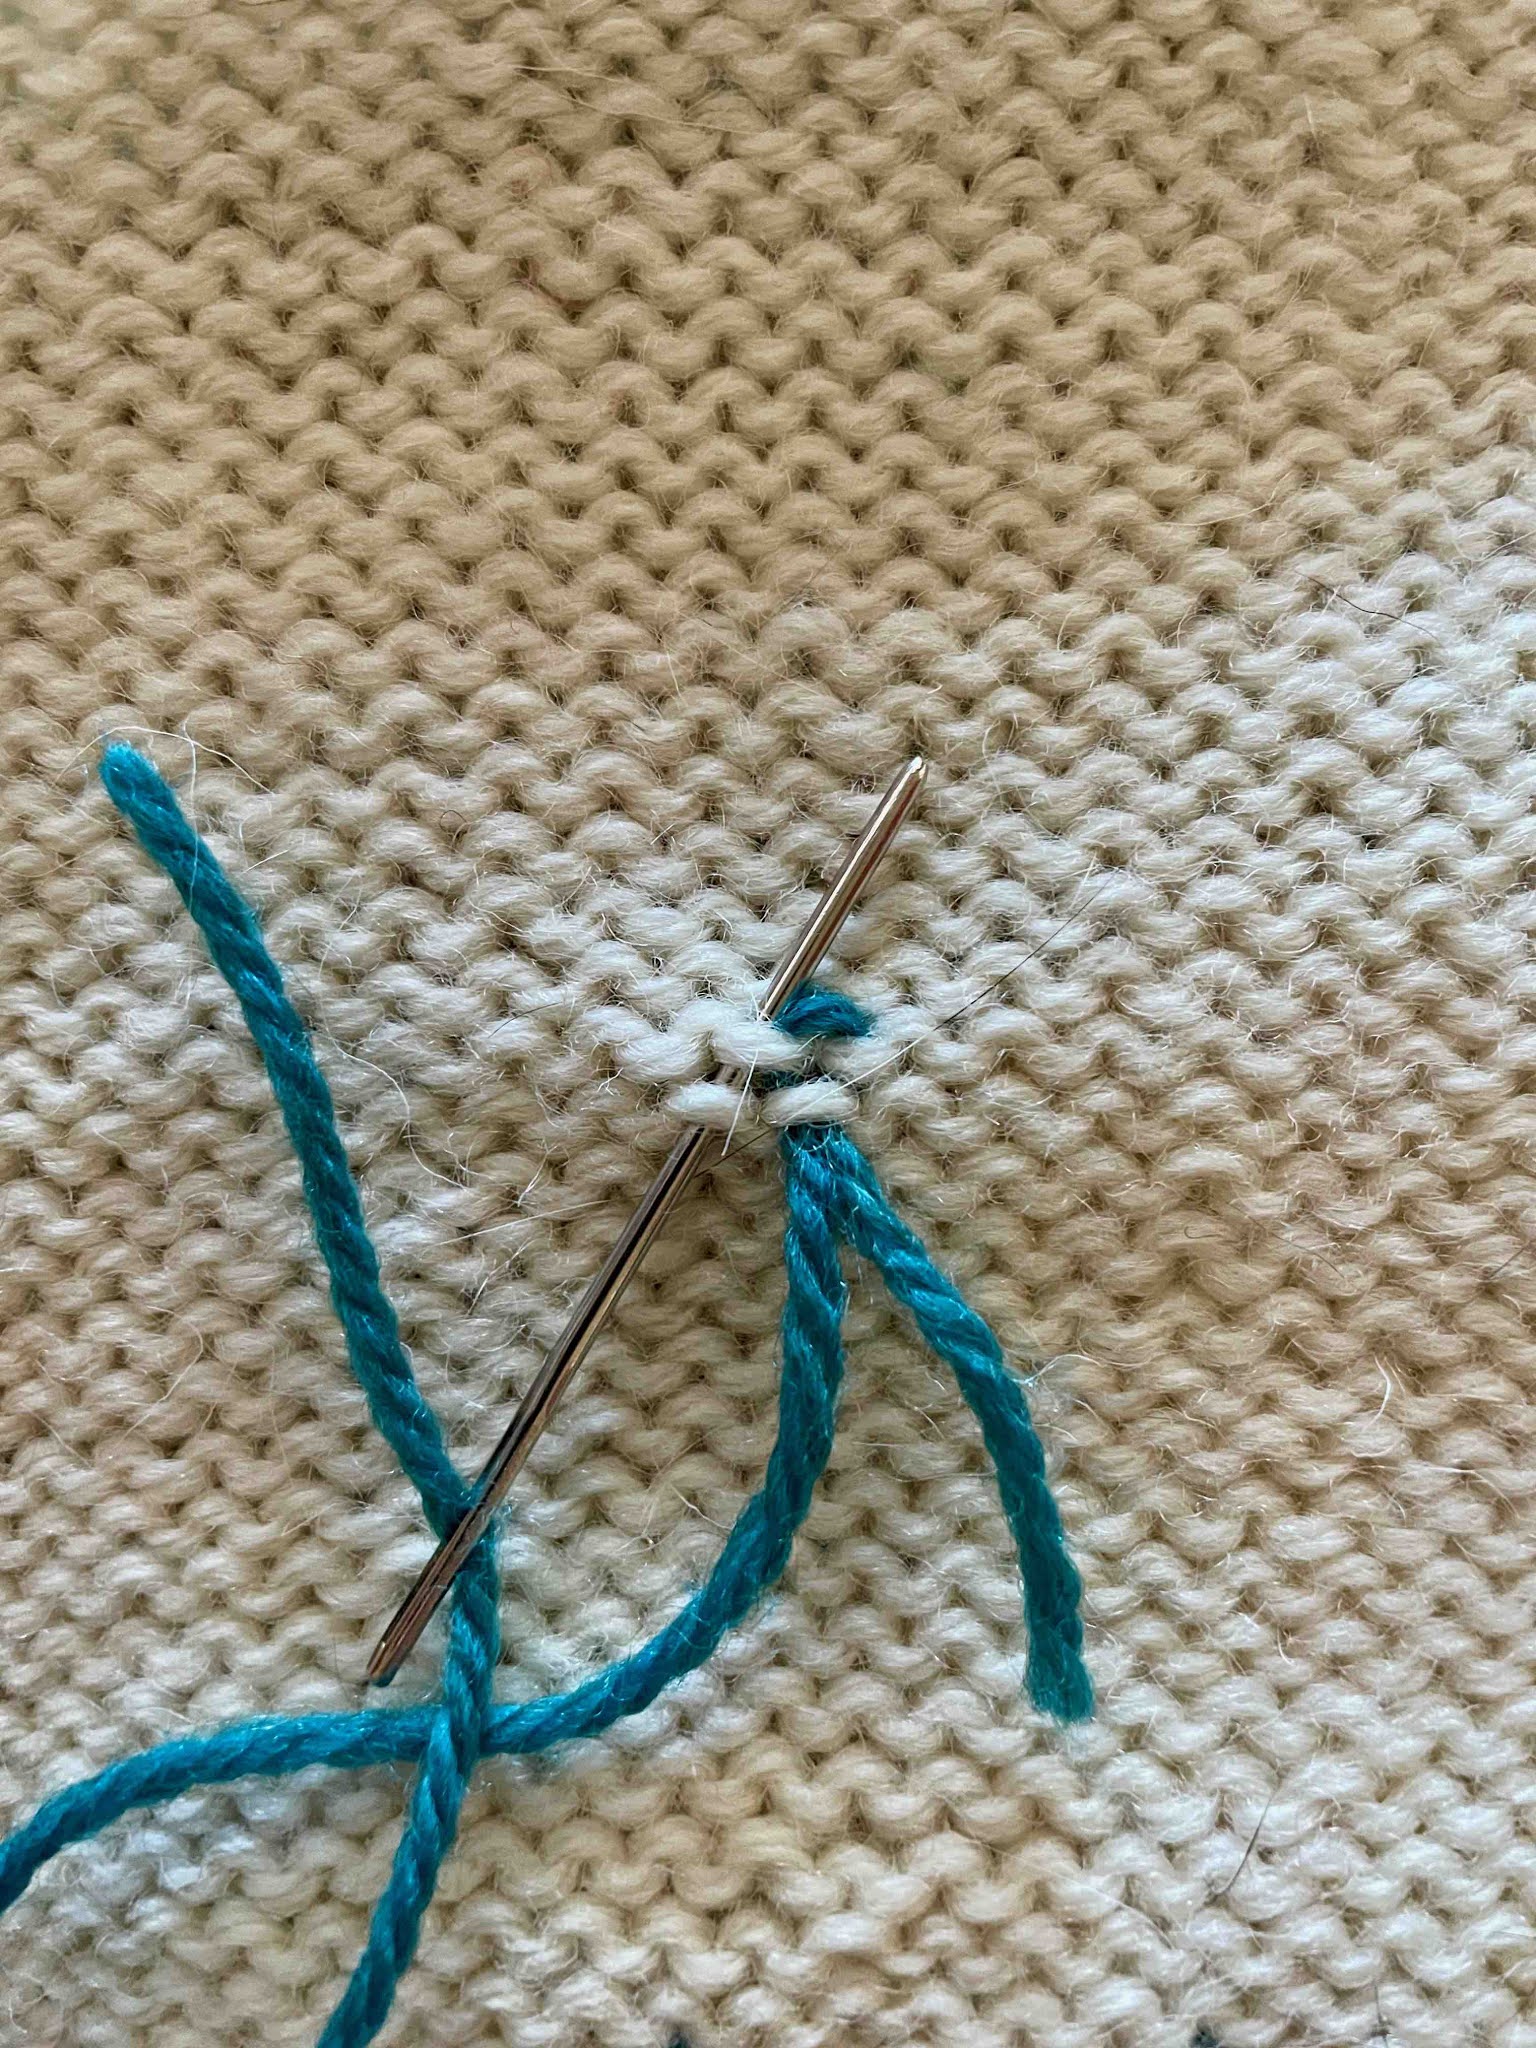
Sunday, May 4, 2025

Gauge Swatches -- The Basics

 It's important to check gauge prior to working any knitting project. If you are working to a pattern, you must match at minimum  the stitch gauge of the pattern. 

Stitch gauge is more important than row or round gauge (most of the time) because it's easier to compensate for length. It's almost impossible to compensate for width.

To make a gauge swatch, cast on enough stitches for at least 4" of the pattern being measured, then add a few extra stitches at each end. It's okay to make the swatch bigger. The bigger the swatch, the more accurate your measurement will be. 

Measure the gauge both before and after blocking. Be sure to note the numbers. 

Measuring Stitch Gauge: 

For simple patterns mark off a set of pre counted stitches. 

Measure these to the closest 1/8th inch.

Divide the number of stitches by the measurement to the closest 1/8the inch.

This gives you stitches per inch. Do not round this number-- leave it as is on your calculator. 

If working a pattern, multiply by 4. Then round to the closest whole number -- this is what you want to match your pattern's gauge. 

If your gauge swatch is too large—meaning you’re getting fewer stitches per inch than required—try again using smaller needles.

If your gauge swatch is too small—meaning you’re getting more stitches per inch than required—try again using larger needles.

For more complicated pattens such as cables and lace or other patterns where it's difficult to count stitches, mark off a set of multiples. Multiply the number of stitches in the multiple by the number of multiples marked off. For vertical patterns using spacer stitches, only use whole multiples -- leave out the extra stitches. For tessellated patterns without spacer stitches, use all multiples and extra stitches. Just be sure to add the extra stitches to your total stitch count when calculating the gauge. 

Calculating row gauge works in a similar way. Substitute rows for stitches in the above method. 

Here are some swatches with marking threads for examples:


Wednesday, February 28, 2024

Working Cable Decreases

I am thrilled to be teaching Full-Fashioned Shoulder Shaping at TKGA's NLKC (Next Level Knitting Conference). It's virtual so you can attend from anywhere! You can learn more about this amazing conference here. 

This post is to remind students how to work the cable decreases. Remember if you attend the NLKC you can watch this class as many times as you like (or just portions of the class) for six months! So go there to  see the decreases being made in relationship to the shoulder configuration. 

The class is all about how to shape shoulders going beyond just sloping. I think you're really going to enjoy this. 

Part of creating full-fashioned shoulders is the use of cabled decreases. Cabled decreases are a unique and very decorative way to decrease stitches. The implications also extend beyond their use for shoulder shaping. But more on that at the end. 

When made at the selvedges, decreases cause the piece to slope. It's especially noticeable when you decrease sequentially. The slope moves toward the decreases ( it moves away from increases -- that just makes sense).

You approach the use of decreases two ways. You can make the decreases slant in the same direction as the slope you are creating. These are called blended decreases. Or, you can slant the decreases in opposition to the slope you are creating. These are called full-fashioned decreases. 


Cable decreases are made full-fashioned. That is they slant toward the selvedges. They are meant to be decorative. The decreases are made using a cable needle with the stitches. The cable needle is either held to the front or back of the work. The stitches on the cable needle are decreased by working some or all of them together with the next stitche(s) on the left needle.  


Two caveats to help remember how to work cable decreases at the selvedges: 

At the beginning of the row, the cable needle is held to the back.

At the end of the row, the cable needle is held to the front. 

You can decrease one, two, and three stitches in one decrease. Here is how to work these decreases:


DECREASING 1 STITCH USING CABLE DECREASES

Right leaning, or CDR (Cable Decrease Right)
Place 1 stitch onto a cable needle and hold to back, knit 1 stitch from the left needle, then knit the stitch on the cable needle with the next st on the left needle. 


Left leaning, or CDL (Cable Decrease Left)
Place 1 stitch onto a cable needle and hold to front, knit 1 stitch from the cable needle together with 1 stitch from the left needle , then knit the remaining stitch on the cable needle. 


DECREASING 2 STITCHES USING CABLE DECREASES

Right leaning, or CDR2 (Cable Decrease Right 2 sts)
Place 2 sts on a cable needle and hold to the back, knit the next stitch on the left needle together with the first stitch on the cable needle, then knit the next stitch on the left needle together with the remaining stitch on the cable needle. 


Left leaning, or CDL2 (Cable Decrease Left 2 sts)
Place 2 sts on a cable needle and hold to the front, knit the first stitch on the cable needle together with the first stitch on the left needle, then knit the remaining stitch on the cable needle together with the next stitch on the left needle. 


Here is how the decreases look: 


Another use for cable decreases is decreasing cables while maintaining the cable pattern such as on the top of a hat, or a cabled yoke, or for any shaping within a cable fabric. Here you can select a cable decrease to match the cables on your project. Then you can decrease and still maintain pattern. 


Saturday, October 30, 2021

Writting Knitting Instructions

Directions should help the knitter quickly and efficiently work a technique. The knitter may be totally unfamiliar with the technique or just need a reminder.

Instructions are a step-by-step explanation of how to do something. Quality instructions are written using clear, simple language. When knitters encounter poorly written instructions it can be infuriatingly frustrating. You may have even experienced this yourself.

Before you write your instructions be sure you have a thorough understanding of the technique. As you write, try to put yourself in the place of the knitter following the directions. In fact, have a friend work from them and give you feedback.

You want the instructions to be as uncluttered as possible. The knitter will most likely be reading with yarn and needles in hand, so it’s important to include all the information needed and leave out anything that could be considered and “extra” or even confuse the knitter. When adding a tip, ask yourself, "Does the reader need this tip to successfully complete this task?” If the answer is no, leave it out.

The following is helpful for the actual writing of instructions:

  • Write the directions in step-by-step format using white space between the steps.
  • Number each step. It’s okay to combine short steps that occur at the same time. Numbers are much easier to refer to than letters or bullet points.
  • Never begin by using the words Now or Next or Then. You’ve already numbered the steps!
  • Use complete sentences.
  • Use the imperative (action) form of verbs. Tell them what to do.
  • Put only the action of the step. Leave out any results from that action.
  • Be consistent in your writing.
  • Capitalize the first word of each step and end with a period.

Considerations

Special Equipment and Supplies
List any special equipment before the step-by-step listing.

Audience and Situation
Will new knitters be using your directions or are the directions for a technique that intermediate or advanced knitters will need? For the Masters program, the level determines the experience level of the audience. Other considerations would be cultural and demographic. You may find you are writing directions for multiple audiences. Finally, keep in mind that although you have an audience that fits in one category, there can be wide variety of experience and background within the category. When considering the audience you can omit information the readers should already know.

Number of Steps
How many actions are needed for this procedure? A simple procedure may take only one step while a more advanced procedure could be 20+. When there are fewer steps the task may seem more doable while a procedure that takes many steps can appear overwhelming. Here is where good organization of the written steps can be helpful. Count the number of steps. Can any be combined? Consider grouping the steps into categories and renumbering them. For example, directions for Kitcheners stitch can be grouped into three sections. Preliminary steps 1. 2. Grafting 1.2.3…. Ending the Graft 1.2….

You can add headings and you can bold important sections.

Tips and Alternate Methods
If you must include a tip or extra information put it outside of the step-by-step instructions either above or preferably below. Alternate methods can be discussed below the step-by-step instructions and can even refer to the numbered directions. For example you could say, “In place of step 4, you can substitute….”

Voice
I listed above to use an imperative verb. A passive voice can lead the knitter to miss some of the instructions. Consider the following:

Insert the needle from front to back in the next stitch.

rather than

The needle should be inserted into the next stitch from the front towards the back to avoid twisting the stitch.

Graphics and Photos
Sometimes a photo or graphic can make something clearer. (Do not do this for the Masters Program)

Sunday, March 7, 2021

Tail Weaves in Stockinette Stitch

 Tail weaves should be unobtrusive. They should be elastic. This means that the fabric is able to be stretched in the area where the tails are woven. The tails should not pop out when the fabric is stretched. And, they should not be visible on the public side of the fabric. Below are the preferred methods for weaving in tails in several common fabrics.

If possible, weave the tails into a seam by going back and forth through the seam several times. This is one reason it’s often recommended to start a new yarn at the beginning of a row. For the Master Hand Knitting Program do not weave tails into any seams for the swatches. On projects, yes, you can weave tails neatly into seams.  

If your project is seamless or for some reason you don't want to use the edge of your project, you will need to weave the tails into the fabric.

Stockinette Stitch

The absolute best tail weave for stockinette is duplicate stitch done on the wrong side. It can be difficult to grasp at first, but once you understand the track that the yarn takes, you will probably use this tail weave on all your stockinette projects.

Here is what duplicate stitch looks like on the purl side of the fabric.


I've left the ends long, so that you can see where they start and end. For your work, cut the ends close to the fabric. 


How to duplicate stitch tails in stockinette:


The tail weave will cover the “frown” under the black pointer, then the “smile” above the red pointer, then the “frown” under the blue pointer. The weave can continue in this manner for as long as needed.


1 Go under the frown and smile covered by the thinner arrow.


2 Go under the smile then frown covered by the thinner arrow.


3 Go under the frown then smile covered by the thinner arrow.


4 Go under the smile then frown covered by the thinner arrow.


Continue in this manner.


How it looks with needle and yarn: 


1 Go under the frown and smile.


 2 Go under the smile then frown.


3 Go under the frown then smile.


4 Go under the smile then frown.


 Go under the frown and smile.


 Continue in this manner.

Tuesday, January 26, 2021

What is Mirroring in Knitting?

 In knitting it is visually appealing to mirror increases and decreases. Other elements should mirror as well.

What is a mirror image? A mirror image is a reflected duplication of an object that appears identical but is reversed perpendicular using the center as the dividing point. In essence right and left are reversed.

So to mirror decreases and increases that appear at the start and end of a row, three things must happen.
1. The slant of the decreases or increases should be in opposite directions.
2. There should be the same number of stitches between the selvedge and each decrease/increase.
3. There should be same number of stitches between each decrease/increase and the center.

Below are some charted examples of decreases: 


Above: The decreases are blended. Notice the slant in opposite directions and are equidistant from the edges.


Above: The first chart has the decreases slanting opposite, but they are not equidistant from the edges. In the second example they are equidistant from the edges but they are not slanting in opposite directions. 

What about the bar increase?  Since it has no slant, that part of the definition is taken out. The "bar" is visible, therefore to mirror the increase, there would need to be the same number of whole stitches before the first bar and after the last bar. Here is a post that explains how to do this.


To mirror within motifs, again the same idea applies. To mirror motifs, the same idea applies.  Below are some examples of how to mirror within motifs:


Above: The top motif shows decreases that are not mirrored while the lower motif shows mirrored decreases.  Here we really see the symmetry that is needed to create mirroring. 


And finally, above we see motifs that mirror within themselves and to each other. 


Mirroring is part of balance and visual harmony.

Wednesday, January 20, 2021

Considerations When Making Yarn Substitutions

Qualities of the Original Yarn:

--Gauge and Yarn weight
Usually, the gauge can be matched by using a yarn from the same category on the CYCA “Standard Yarn Weight System.”  Yarn weight refers to the thickness of a yarn. The CYCA yarn standards categorize yarn based on wpi or wraps per inch and ypp or yards per pound.

For worsted weight yarn(#4):  Using the yarn from the pattern, determine the number of yards per 50 grams; figure 15%.  Look at the yarn you want to substitute and figure the number of yards per 50 grams.  If this number is within 15% higher or lower than the original yarn, it is probably a good match.
For fingering ( #1), sock (#2) and  dk weight (#3) figure 20%. For bulky (#5) and super bulky (#6), figure 10%.


To determine the approximate gauge a yarn will knit when two strands are held together (doubled):  multiply the stitches per 4 inches listed on the ball band by .73 (or 73 %).  Remember you will need to double the amount of yardage that you buy.


--Fiber
Fiber content will influence how a yarn looks when knitted. Substituting a yarn with similar fiber content and structure will help obtain a fabric similar to the original. Animal, plant and synthetic fibers all have unique characteristics. All yarns will have specific qualities depending on their source.
--Ply
Compare the ply of the substitute yarn and the original yarn. Ply affects a yarn’s balance. Single ply and various multiple ply yarns will all work up differently. Even the direction of the ply (Z or S) will affect a fabric’s look.
--Texture
Determine if the item being made needs a certain texture for the yarn. Smooth yarns will highlight stitch work better.  Other textures include slubby, boucle, haloed eyelash, and thick and thin yarn.
--Drape
Fiber, ply, texture and gauge will all affect the eventual drape of the fabric. Drape is a description of the firmness of the knitted fabric. Decide on how flexible or stiff the finished fabric should be and choose a yarn with a fiber, texture and ply worked at a set gauge that creates this drape.

Other Considerations:
Use
- Stranding, steeking, felting, lace, cabling.....
Color- Check that colors will work with stitch pattern and/ or written pattern. Check for bleeding.
The Recipient- Consider preferences, allergies, cost, and care.

Work a Swatch
Make a swatch that is at least four inches by four inches. Include stitch or color patterns from the pattern. While working the swatch look for any potential problems and see how the yarn feels to your hand. Check the gauge.  Block the swatch. Check the gauge again. Blocking will also give you an idea of how the yarn launders.   See the post on how to measure gauge.

Buy the Right Amount:
Using the original, yarn multiply the yards per ball by the number of balls needed for the pattern.  This gives the total yardage necessary.  Take this number and divide it by the yardage per ball of the new yarn to find the number of balls needed.  Consider getting extra yardage, you never know if you will need it.

# of yds on original ball of yarn  x  # of balls needed for size on pattern ÷ # yds on substitute ball of yarn = # of balls needed of substitute yarn.


Tuesday, January 19, 2021

The Bar Increase or Kfb (Knit in the front and back)

 The Bar Increase is considered decorative in some fabrics and blended in other fabrics. It is abbreviated-- kfb because you knit into the front and then the back of a stitch. This creates a small bar to the left of the stitch, which is visible in stockinette making it decorative. It is less noticeable or blended when strategically placed in ribbing, or when used in garter stitch because the bar blends in with adjacent purl stitches. Depending on where you place the increase, it can also blend in with seed stitch and other pattern stitches. Always swatch to see what the increase will look like and to find the best place to put it.

The increase is simple to work. Insert the right needle into the next stitch as if you were going to knit it. Wrap the stitch as if you are going to knit it. Pull the loop through, but do not remove the stitch from the left needle. Take the right needle and insert it into the back of the same stitch. Wrap the stitch again and pull the loop through. Remove the original stitch from the left needle.

Below the photos show the bar increase in both stockinette and ribbing.


When placing this increase on opposite selvedges, it's important to mirror the increases. Mirroring means that there will be the same number of stitches before the bar on the right side and after the bar on the left side. To do this: On the right side work the number of whole stitches desired minus 1. In the next stitch work the bar increase (kfb). Since the bar appears to the left the whole stitch will appear to the right of the bar. On the left side work to the desired number of stitches wanted after the bar plus 1. Work the bar increase. Since the bar is to the left of the stitch, the remaining stitches will need to be the desired number.

Example: You want 2 stitches at each selvedge between the edge and the bar. On the right: Knit 1, kfb into the second stitch.  On the left: Knit until 3 stitches remain, kfb into the third from the end. 2 stitchess will remain. 

There is a small hole that appears below the bar. To mitigate this, don't work too tightly. When manipulating fabric close to the edge is it also common to have tension issues or guttering, so take care to manage your selvedge tension on these rows.

Friday, December 18, 2020

Accurately Calculate Stitch Gauge

I have read so many ways to calculate gauge, it sometimes makes my head spin. In this blog post, I am going to describe how to ACCURATELY measure gauge. And how to use these numbers.

Most knitters make a gauge swatch then count the number of stitches in 4" or even 1".  But this method isn't really accurate. 

How to Measure Gauge.

For basic fabrics of 1 to 2 st multiples where stitches are easily identified.

First make a gauge swatch that is at least 4".    

Using Marking threads, mark a set of stitches. Do not include selvedge stitches. If marking a gauge swatch, you will measure along the center horizontal. Here is an example in Seed Stitch that is marked for measuring stitch gauge.


.


Marking threads can also be placed to measure rows. Don't include any cast on or bind off rows.


Be sure the marking threads are thinner than the project yarn and that you place them between stitches. 


Count the stitches between the threads and then measure the distance between the marking threads. Measure to the closest ⅛ inch. On the example below there are 21 stitches measuring 4 ⅛”.


Convert the fraction to a decimal.
(1⁄8 = .125, 1/4 = .25, 3⁄8 = .375, 1⁄2 = .5, 5⁄8 = .625, 3⁄4 = .75, 7⁄8 = .875)

In the example 4 ⅛” = 4.125”

Divide the number of stitches by the measurement.
Example: 21 ÷ 4.125 = 5.09090909090909

This gives you stitches per inch.

Uses for this measurement:
Figuring out the size of piece. — Don’t round this number.
Figuring a cast on number for a certain size. — Don’t round this number.
Figuring a ratio for seaming or picking up stitches — This number should be rounded.

If you are following a pattern or writing a gauge statement for a pattern, multiply the unrounded sts per inch by 4 to get the number of stitches per 4”.

5.09090909090909  x  4 = 20.36363636363636.  This number is rounded to the closest whole number.  For this example 20 sts = 4”.

 For fabrics with larger multiples.

A multiple is a set of stitches that repeats horizontally. There are two types of fabrics that fit this category.

The first type is a motif that runs vertically and has spacer stitches between the motifs.
The multiple for this type of pattern is the motif + one set of spacer stitches.
Below is an example. The swatch shows a cable with 2 rev st st between each cable.


Notice there must be “extra” stitches to horizontally balance these patterns. These “extra” sts should not be included when measuring gauge. Remember, the multiple is the set of sts that is repeated. So for this cable pattern there are 3 reverse stockinette sts and all of the stitches that make up the cable in each multiple. 3 reverse stockinette stitches are added at the end of the row to horizontally balance the pattern.

To measure these types of patterns, measure the most whole multiples you can. And again, measure along the center horizontal.

The second type of motif structure is a tessellated motif. In this situation, the motif moves both vertically and horizontally. Extra stitches are used to “cap” the start and end of the motif at the sides. In this situation, use all of the stitches, but don’t include any background stitches to either side or above/below the motif. 


The following is a gauge worksheet that you can use to calculate gauge. 

GAUGE WORKSHEET

Determine Stitch Gauge

Measure the width:
 (1/8 = .125, 1/4 =  .25, 3/8 = .375, 1/2 =.5, 5/8 = .625, 3/4 = .75, 7/8 = .875)

Count the number of stitches:

Divide the number of stitches by the width. This gives you the number of stitches per inch. Do not round off the number.

Number of stitches per inch:

Multiply the number of stitches per inch by 4 to get the number of stitches in four inches. Round the number up or down.

Number of stitches in four inches:

Determine Row/Round Gauge

Measure the length:
(1/8 = .125, 1/4 =  .25, 3/8 = .375, 1/2 =.5, 5/8 = .625, 3/4 = .75, 7/8 = .875)

Count the number of rows or rounds:
(Do not include the cast on or bind off edges)

Divide the number of rows/rounds by the length. This gives you the number of rows/rounds per inch. Do not round off the number.

Number of rows/rounds per inch:

Multiply the number of rows/rounds per inch by 4 to get the number of rows/rounds in four inches. Round the number up or down.

Number of rows/rounds in four inches:


If you are getting fewer stitches than the recommended gauge, try using a smaller needle size.
If you are getting more stitches than the recommended gauge, try using a larger needle size.

Once you have calculated the gauge on your unblocked swatch, block the swatch and remeasure the gauge. 

 The blocked swatch will tell you your finished gauge. But you will need to work to your unblocked swatch gauge in order to have the finished gauge match the finished gauge of your swatch once you block your project.  

Monday, January 25, 2016

The Figure 8 Join

The figure 8 join is used to join two seperate pieces of knitting so they can be seamed.

 There are three steps to the figure 8 join.

 Step 1:
 Insert the needle into the bottom of one piece either in the cast on edge or above the cast on edge from back to front.

 Step 2:
Insert the needle into the bottom of the opposite piece from back to front. If you went above the cast on in step 1, go above the cast on in step 2. If you went into the cast on in step 1 go into the cast on for step 2.

 Step 3:
Insert the needle into the exact same spot you inserted the needle in step 1 from back to front. If you fail to work the last step, you do not create a figue 8.

 Remember, as experienced knitters, it's often easy to "predict" or expect to see directions or things in patterns. And sometimes we read the directions, but our hands do something else, because subconsciously it might seem more logical or it's what we think should happen.

This is what I think happens to many people when they try to work this join.

 Common mistakes we see:

 Step one is correct, but step two the yarn is worked front to back rather than back to front. This makes a figure 0 and does not securely join the pieces.

 Step 1 and 2 are worked correctly, but in step 3 the needle is either brought up through the intial insertion poin and then under the first seaming bar. Or, the needle is brought under the first seaming bar on the original swatch.

 If you do this, you will seam the cast on row of the second swatch to the first row on the first swatch. They will be misaligned. The bottom will not lie straight.

It gets even more disasterous for seed stitch, because the rows are now off by one and if you planned to carry the pattern over the seam, you won't, unless you make a fudge somewhere by working two bars from one swatch.

 Here is a video.

Tuesday, June 23, 2015

Anchoring a Stitch for Tail Weaves and Direction Change in Duplicate Stitch

Duplicate stitch is a technique for covering already knit stitches. It's good for lines and small areas. If the area is too large the item gets bulky, so duplicate stitch wouldn't be the best technique for that area. Intarsia or Fair Isle (stranding) would be a better choice. Many knitters work forward with duplicate stitch thinking how easy it is. The reality is it is one of the more difficult of techniques to get correct. To the astute, trained, review committee eye, errors stand out. Common problems are: Poor stitch coverage Twisting of stitches at the base Splitting both the working thread and base stitches Legs at the base of an end stitch don't separate, but rather lean in the same direction This blog post deals with the last problem. End stitches that sometimes appear twisted or have both legs leaning in the same direction. The problem occurs because the tail or working yarn is brought inward towards the stitch worked in that set. The solution is to anchor the stitch to the outside stitch by splitting the outside stitch slightly and then continuing forward with the tail weave or duplicate stitch. Below is what anchored stitches look like.

Sunday, September 7, 2014

Don't Confuse Mosaic Knitting with Color Slip Stitch Knitting --They Are Different

The latest issue of Cast On Magazine includes my article on Types of Slip Stitch Knitting. Slip Stitch Knitting is a large category which includes different types of finished stitch patterns.
Categories of Slip Stitch Knitting include:
  • One color used to create a textured fabric 
  • Non-color dependent patterns-- Patterns that can use one or multiple colors but texture is the main focus. 
  • Color dependent patterns --Patterns must contain at least 2 colors and the emphasis is the color pattern created. 
  • Slip stitch patterns combined with other knitting techniques
  • Mosaic knitting, a type of slip stitch work invented by Barbara Walker.
  • Brioche knitting, a type of slip stitch work that uses yarn overs and slipped stitches to create layered, fluffy fabrics. These can be one or two colors. 
  • Double Knitted Fabric-- Typically worked in two colors but can be worked in a single color. 

Mosaic, Brioche, and Double Knitting use slipped stitches to create unique fabrics. These sub-sets of slip stitch knitting are regarded as their own separate categories of knitting.  They have characteristics that separate them from typical slip stitch work and are considered apart from Slip Stitch patterning. 

Most knitters can easily see the difference between Brioche and Slip Stitch work. It's also easy to see the difference between Double Knitting and Slip Stitch work. However, many knitters often confuse Mosaic Knitting and Color Slip Stitch Knitting.


The following chart summarizes the similarities and differences between Color Slip Stitch Knitting and Mosaic Knitting: 


Basic Color Slip Stitch Patterns
Mosaic Patterns
Similarities
One color is worked at a time. Textured fabric is created. Colors are carried along the selvedge. Both use slipped stitches to create the patterning. Can be worked in rows and rounds.
Fabric
Creates its own fabric through the use of varying texture. 
Worked on a base of either stockinette or garter stitch.
Design
Uses small repetitive motifs. Patterns tend to be simple with short multiples and repeats. 
Patterns are geometric ranging from simple to complex. Multiples and repeats tend to be longer then typical slip stitch patterns.
Color contrast
Look can vary depending on how much colors contrast.
Colors must contrast.
Number of colors used
Can use 2 or more colors. Some patterns don’t require color.
Uses 2 colors.
Number of strands used per row
Most patterns work alternating colors using 1 strand similar to Mosaic, but there are patterns where more than one color is used per row using the intarsia technique. 
The 2 colors are alternated with one strand worked for 2 rows then the other color worked for 2 rows.
Color sequence
Colors may be worked for 1, 2, or more rows and alternated in varying sequences. 
Each color is worked for 2 rows first on the RS then on the WS.
Row repeats
RS and WS rows are usually different.
WS rows are worked exactly as the previous RS row. Occasionally an accent stitch may appear. 
Orientation of slipped stitches
Stitches can be slipped both knitwise and purlwise, depending on the pattern.
Stitches are slipped purlwise.
Placement of working yarn while slipping stitches (Floats)
Yarn can be held to either the RS or WS of the work when slipping stitches.
Yarn is held to the WS of the work when slipping stitches.
Combination with other stitch patterns
Can be incorporated with other techniques.
Does not combine with other techniques. Special borders have been created to work with Mosaics including Mosaic rib and Mosaic seed stitch. 
Charts
Because of their simplicity, row by row instructions work well and charts are generally not needed. If the pattern is charted, then every row will be shown using standard charting technique, using a symbol for the slipped stitch.
 Employs a unique charting system developed specifically for Mosaic Work. Each row is read from right to left and then from left to right. There are exceptions. Charts are usually easier to read than row by row directions. Typical chart will not use a symbol to designate stitch to be slipped. 


Sunday, May 4, 2014

Charting Vertical Designs

Let's start by looking at a few vertical designs:

Lace:

Color:
Cable:

Notice that while the motif can be extended horizontally in all of the above examples, the design must extend vertically.  In each example, one multiple or several multiples are possibilities. The design does not depend on having more than 1 multiple. 

I will use a cable for this charting and designing example.

I have chosen to work a project using the following cable and this is how I find it charted in my stitch dictionary:

OXO Cable
Multiple of 8
Rows 1 & 5(RS): C2F, C2B
Rows 2 and all WS rows: p8
Row 3, 7, & 11: K8
Rows 9 & 13: C4B, C4F
Row 14: P8.

Did you notice the chart only shows RS rows?  The pattern directions must state how to work all WS rows. 

In my design the cable needs to be worked 10 times across the row in order to get the correct size. I also need to use spacer stitches to separate the cables.  I have determined that the cables will be separated by 2 reverse stockinette stitches. 

First let's determine the multiple:
Remember, the multiple is the set of stitches that repeats across the row.
The multiple will consist of the cable stitches + spacer stitches. There will need to be extra spacer stitches at the end of the row to balance the cable horizontally.  

*Spacer stitches become part of the multiple*

Next, I will determine the repeat:
The idea here is to begin the cable on the row that will best complement the design. Whatever row I choose now becomes the "row 1" of my pattern. The rows will need to be renumbered and charted accordingly.  The directions in the pattern should state to begin all charts on row 1. (There are exceptions)  I decide that I want my cable to start with a complete O and end with a complete O---- Balance!

To do this I must start the chart as shown in the reference on row 5. Therefore row 5 becomes row 1 in my pattern.

My final chart will look like the following:


Things that must be in my pattern:
Identify 102 stitches where this chart should be worked.
The green box needs to have some explanation.
Directions for working wrong side rows.
Directions for working C4B and C4F.
I also must direct to work rows 1-14 but end by working rows 1-8.


Monday, April 7, 2014

Generating Charts for Knitting Patterns Part 2(cont) Multiples and Repeats

To chart any design, you must first understand the concept of using multiples and repeats.  This is probably one of the hardest concepts when learning to design and write pattern. Once you get it, everything starts to fall into place.

The definitions get a bit confusing for some people because  the work "repeat" is used as both a noun and verb.

Multiple-- A set of stitches that repeat across a row.
Repeat--A set of rows that repeat vertically.

*Neither is set in stone. You can choose which set of stitches you want to delineate as the multiple. You can also rearrange the rows to suit your pattern.

Example:
This chart shows 2 multiple and 4 repeats

Did you spot the multiples and repeats?: 


Stitches 1-6 repeat across the row so they are the multiple and rows 1-4 repeat vertically making them the repeat. Both could continue for as many stitches or rows needed.

But there are a couple of problems. 

Problem 1-- The piece is neither balanced horizontally nor vertically. 

To balance this cable, I need to add 2 reverse stockinette stitches to the left of the second cable and 1 non-cabled row to the top: 


So where are the multiples and repeats?


But this works as well.
The original


In both examples there are going to be extra stitches and an extra row.  

When you look at a stitch pattern either charted or written, you will often find that the multiple will be expressed before the row by row direction or chart. 

For the original chart the multiple was six. But,... for these bottom 2 charts the multiple is now 6 + 2. Six is the original multiple, the set of stitches that will repeat and 2 represents the number of stitches outside the multiple, needed to complete the pattern. Extra stitches are only worked one time on the row, either before the multiple is repeated across the row or after the multiple is repeated across the row. 

Typically the repeat (for rows) is not expressed. It is up to the designer or knitter to add the appropriate rows to the end (or beginning) of a pattern for vertical balance. 

Here are some other possibilities with this example: 


The second example above brings us to problem #2. What if I want to rearrange the rows?

Suppose I want to start and stop the cable with a cabled row: 


So where is the multiple and repeat now?


And just like our original example, the multiple could be shifted to the left 2 stitches. But the multiple will always be 6 + 2.  


There are 2 possibilities for presenting the final chart: 


Remember in Part 1 that I mentioned the main directions should state how to work the chart?  

The directions for chart 1 would instruct to work Final Chart 1 over a number of stitches that is a multiple of 6 + 2.  (examples: 32, 602, 68) and to repeat rows 1-4 to a certain length ending with row 4  or to work rows 1-4 a specified number of times (the end length would be based on the row gauge for that piece) then work row 5 of the chart.

I like chart 2 better. Here the directions would be similar.  Work Final Chart 2 over a number of stitches that is a multiple of six + 2. Cont working rows 1-4 to a certain length or  a certain number of times, then work row 1 once more. 

Notice on chart 2 that I did not use a box. On this chart I only need to delineate the multiple. Boxing those stitches would be acceptable. But for chart 1 I must use the box, because here I must delineate the repeat.